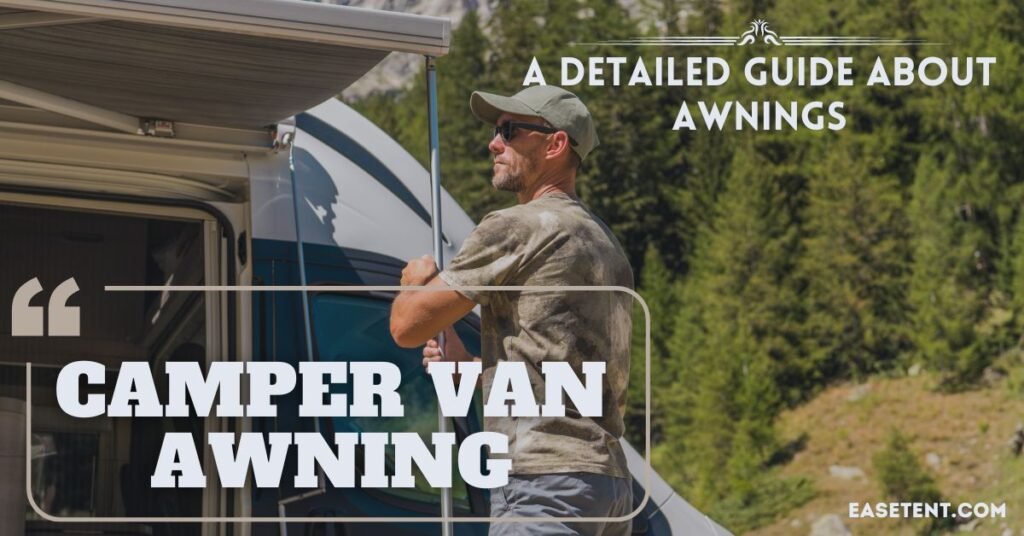
If you’ve camped in a van before or were thinking about using it for your next camping trip, you must have heard the term “camper van awning.” But what exactly is it? And why should you choose one for your camper? In this article, we’re going to take a look at camper van awnings, including their functions, various types, ideas, pre-purchase considerations, and a lot more.
Table of Contents
What is a Camper Van Awning?
A camper van awning is just like a portable shelter that attaches to a selected side of your camping vehicle and extends your living and working area in the fresh air. It usually consists of a fabric canopy that is supported by poles or an aluminum framework, which means you can simply put it up and take it down whenever you want. Awnings are available in a variety of designs and dimensions to accommodate different Campers and fulfill your vacation preferences.
Purpose of an Awning
The primary function of an RV’s awning is to give you an extra outside living area and protection from weather conditions. Here is a summary of why campers enjoy them:
Extended Living Area:
- Awnings provides a covered outdoor area where you can relax, cook, dine, or socialize.
- It increases the usable area in your camper.
Weather Protection:
- It offers shade from harmful sun rays on hot summer days and safety from heavy rainfall, which allows you to enjoy incredible natural surroundings regardless of how bad the weather is.
Versatility:
- You can use the awnings for an array of motives, such as setting up a dining area, providing storage space, and forming a relaxing lounge zone.
Camper Awning Ideas
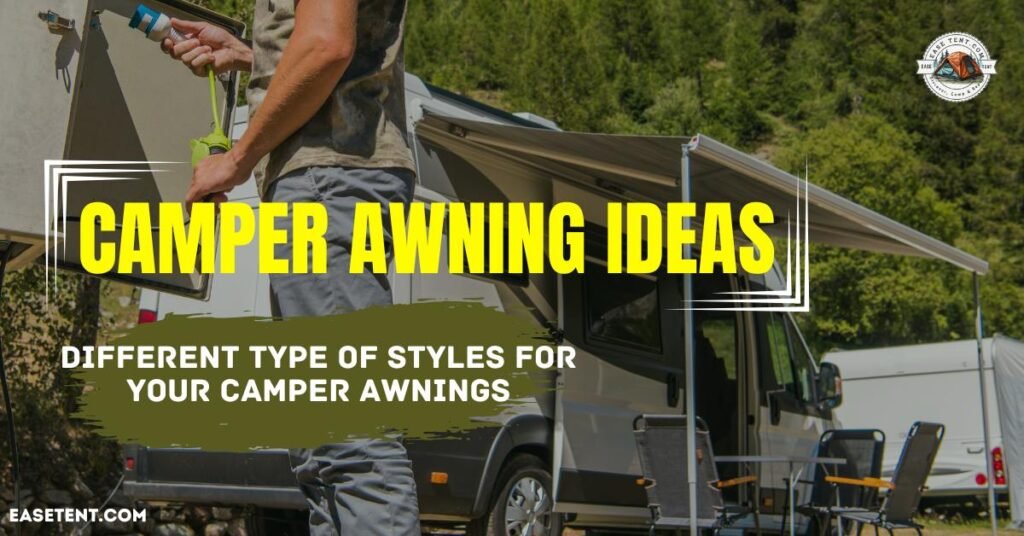
Camper awnings provide flexible outdoor locations that can be customized according to your personal camping desires and requirements. Here are some innovative RV awning ideas to make the most of this extra living space:
Outdoor Dining Area:
- Set up a folding table and comfortable chairs under the canopy for a relaxing outdoor dining experience.
- Enjoy the meals in nature without worrying about direct sunlight and light rain.
- Establish a relaxing lounge area with comfortable seating arrangements, such as camp chairs, bean bags, or outdoor cushions. Place a tiny table for snacks and drinks to make it a perfect place to unwind while enjoying the views.
Workstation:
- Take advantage of the shaded area by using it as a workstation.
- Bring a lightweight desk or a folding table to place your laptop, books, or arts and crafts materials.
- This setup permits you to perform your job duties and pursue hobbies while enjoying the garden environment.
Gear Storage
- Maintain your camping essentials organized and protected by taking advantage of the tarp’s space for its storage facility.
- Hanging organizers, gear racks, or storage bins are used to properly store items like cooking utensils, camping supplies, and other important goods.
Play Area for Kids
- If you are camping with children, declare a corner of the awning space as a play area for your kids.
- Lay down a floor mat or use outdoor rugs, along with toys or games to keep the kids entertained as they’re sheltered from the sun.
Yoga or Exercise Space
- Utilize the awning area for early morning yoga or workouts.
- Roll out a yoga mat or use the space to stretch and do bodyweight workouts while taking in the fresh air and natural surroundings.
Pet Retreat.
- If you’re traveling with pets, you have the responsibility of providing them a designated space.
- Hence, decide on a corner or a portion of the awnings covered to provide your pet a comfortable retreat.
- Lay down a pet bed or blanket so they can relax and enjoy the outdoors alongside you.
Choosing the Best Awning for Your Camper
Choosing the best awning for your camper means considering several factors to ensure it meets your needs and enhances your outdoor experience. Here’s a guide to help you make the right choice:
Size and Compatibility
- First of all, inspect your camping vehicle’s dimensions and layout to figure out an appropriate awning size.
- Consider how the canopy will be attached to your camper—whether it is mounted on the roof, side, or rear—and make sure it is compatible with your vehicle’s model and dimensions.
Ease of Setup
- Consider how simple its setup and take-down mechanism.
- Especially if you regularly change campsites like going to a travel camp and navigating from one place to another place.
- So, you have to search for shelters with straightforward mechanisms or features, such as self-locking arms, for easy deployment.
Durability and Material:
- Always go for a shade structure that is made from durable materials like polyester or acrylic fabric and it is supported by robust frames or poles.
- Resistant to ultraviolet radiation and waterproof materials are critical for lasting outdoor elements and ensuring a long lifespan.
Portability and Storage
- If space is a problem during your camping trip, then you must prioritize compact and easy-to-store awnings when they are not in use. Consider weight and dimensions for convenient transport and storage.
Brand Reputation and Reviews
- Look into awning brands that are known to have established a track record for excellent manufacturing and customer service.
- Read customer reviews from other campers to learn about real-world performance and durability.
Budget
- Select a budget that matches your preferences and requirements.
- A canopy’s prices vary on different aspects like size, features, and brand, so compare the cost to the value and benefits you expect.
Warranty and After-Sales Support
- Before dealing verify the manufacturer’s warranty and after-sales support because a reliable warranty protects against imperfections or early damage caused by use.
Additional features:
- Integrated Lighting:
- Several awnings entail built-in LED lights or mounting holes for lighting accessories, which improves visibility at night.
- Side Panels:
- The awnings with optional side panels can provide additional privacy, wind protection and enclosed spaces.
- Mosquito Nets:
- Look for awnings with mesh screens to keep insects out while you relish the great outdoors.
How much is an Awning for a Camper?
The cost of an awning for a camper may differ extensively due to multiple variables, including the type of awning, dimensions, quality of the material, company, and extra amenities. Here’s an overview of pricing:
Types of Awnings:
Basic Manual Awnings:
- Price Range:
- If you don’t want to invest much in your camping accessories, this is a perfect choice for you because manual awnings are typically the most affordable option.
- Cost:
- Generally, a basic manual awning will cost from $200 to $400 for smaller sizes.
Retractable Awnings:
- Price Range:
- Retractable awnings typically become a bit more costly because of their ease of use and automated operation.
- If you have a strong budget and you want a stress-free adventure, then I suggest you go with this option.
- Cost:
- Retractable canopies mainly cost between $500 to $1,500 or more, depending on the size of the material and quality.
Cost Influencing Factors
- Size:
- Bigger shelters naturally cost more than smaller ones due to the increased material and framework required.
- Material Quality:
- High-quality materials like UV-resistant and waterproof fabrics, along with sturdy frames, can increase the cost.
- Popularity of Campany
- If any brand has own an excellent quality reputation, it is obvious that these companies have been providing good quality products to their customers for a long time, and because of their quality products and popularity, they charge more than others.
Further Reasons
Integrated illumination:
Awnings that include LED lights or light attachment points may be more expensive.
Side Panels:
Shades that come with or offer the option of adding side panels for additional privacy and weather protection may be more expensive.
Mosquito Nets or Screens:
Those awnings that have mesh screens to keep insects out of your vehicle can also cause an increase in the total cost.
Budget Considerations
Entry-Level Budget:
- If you are a newbie or for some reason you have a tight budget, basic manual awnings are the most suitable choice because if you purchase an automated awning, it is also complicated to set up and it contains more risk of errors and problems in its machinery.
- So, at first, make use of manual awnings and gain experience, and then move on to auto awnings if you want.
Mid-Range Budget:
- Retractable or drive-away awnings offer a good balance of convenience and affordability.
High-End Budget:
- If you are a professional camper and you also have a substantial budget, then you have to go for premium awnings with advanced features and durable materials because they are ideal for campers who are looking for long-term investment.
Shopping Tips
Compare Prices:
Visit different retailers and compare their prices with each other to find the perfect deal.
Used or Refurbished Awnings:
Check out digital apps where individuals list their used products at half price, and you can purchase secondhand and refurbished goods at cheap rates by compromising on quality.
Pros and Cons of Camper Van Awnings
Let’s analyze the advantages and disadvantages of using camper van awnings via a detailed comparison:
| Pros | Cons |
| Provides additional outdoor living space | Requires additional setup time |
| Offers shade and protection from the different outdoor elements | Adds weight and bulk to the camper |
| Enhances camping comfort and enjoyment | Initial investment cost |
| Versatile for many outdoor activities | After or during usage, it may require maintenance and repairs |
| Provides extra usable space for dining and socializing | Limited effectiveness in strong winds |
| It can be adapted for different uses and setups | Could restrict the access to specific areas of the camper. |
| Whenever you want to resale your camping vehicle awning it adds value to the camper for resaling. |
What is Drive Away Awnings?
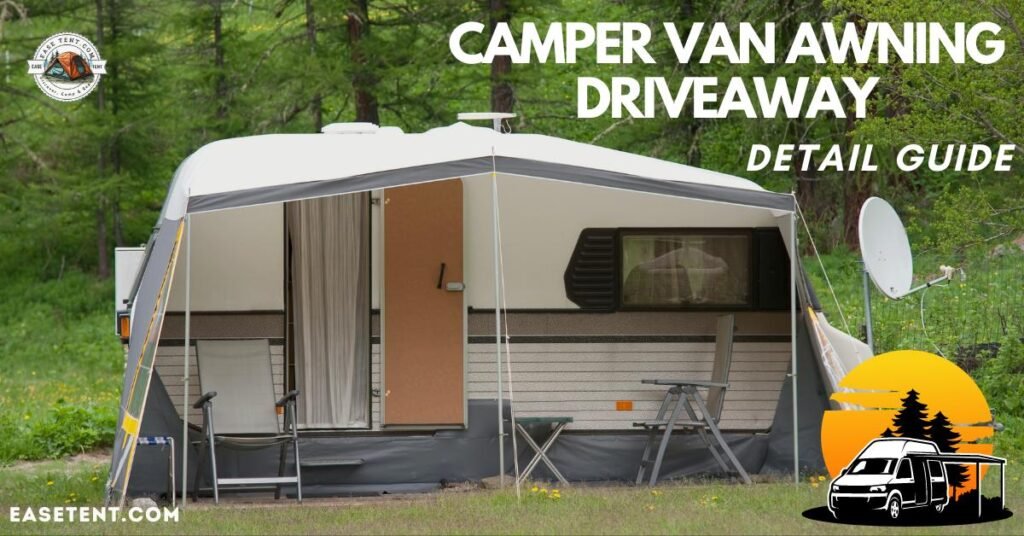
A drive-away awning is a type of tent or shelter that attaches to your camping van by using a tunnel or sleeve. If you use a drive-away awning it allows you to separate the awning from the van and leave it at your campsite as a tent, so you can use the vehicle for day trips and other activities. Drive-away awnings also provide freedom of movement and ease of use which makes it popular for travelers who want to travel while maintaining a base camp. The prices of driveway awnings start from roughly $300 to $800 for basic drive-away awnings.
Here’s everything that you should know about drive-away awnings:
Features:
- Detachable Design:
- As I already mentioned, it can be quickly detached from the camper van by using a sleeve or tunnel system.
- Secure Attachment:
- It gets attached securely to the camper van when parked and provides stability and protection from outdoor hazards.
- Ease of Usage:
- It offers peace of mind by allowing campers to use the awning independently from the camper van.
- Also its quick and straightforward arrangement and detachment make the drive-away awnings a favorite among camper van enthusiasts.
If you also want a comprehensive guide on detaching your drive-away awning using a tunnel or sleeve system, then i suggest you to dive into this “Detaching the Drive Away Awning: Step-by-Step Guide” informative blog post!
Camper Van Awning Lights
Camper van awning lights are specially designed lighting solutions used to illuminate the area around and under the awning of a camper van during outdoor activities, particularly in the evenings or at night. These lights are essential for enhancing visibility, creating ambiance, and improving safety at the campsite. Here’s a detailed explanation of camper van awning lights:
Features of Camper Van Awning Lights:
- LED Technology:
- Most of the modern camper van awning lights use energy-efficient LED (Light-Emitting Diode) technology.
- These LED lights are preferred for their longevity, brightness, and low power consumption, which makes them ideal for camping situations where power sources are limited.
- Weather-Resistant Design:
- Camper van awning lights are designed to survive natural hazards such as rain, wind, and dust.
- They are usually enclosed in weather-resistant materials to protect against moisture and guarantee durability in various weather conditions.
- Mounting Options:
Camper van awning lights can be mounted in different ways like:
- Awning Poles:
- These lights are directly attached to awning poles or frames through clips or brackets.
- Awning Fabric:
- Some lights are designed to be attached directly to the awning fabric using hooks or adhesive strips.
- Stand-Alone Structures:
- These lights are attached to a pole and can be placed on the ground near the awning.
Considerations for Choosing Camper Van Awning Lights:
- Brightness Levels:
- Before buying, you have to consider the brightness and color temperature of the lights based on your preferences and intended use.
- Power Source:
- Choose lights that are compatible with your camper van’s power setup (battery-powered, rechargeable, or solar-powered).
- According to my suggestion, solar-powered lights are always the best choice because you don’t have to stress about their charging. They can easily charge up through sunlight.
- Durability:
- Opt for lights that are made from durable materials and can withstand different harsh conditions.
- Installation and Setup:
- Always ensure the lights are easy to install and adjust according to your awning setup and configuration.
Camper van awning illumination improves the camping experience by providing valuable and decorative lighting for outdoor living areas. They contribute to safety, comfort, and enjoyment, which allows travelers to make the most of their outdoor adventures any time of the day or night.
Camper Van Awning Parts
Understanding the different components of a camper van awning is critical for shelter setup, maintenance, and troubleshooting. Here’s a detailed explanation of the key components that comprise a typical camper van awning:
Main Components of Camper Van Awning:
- Awning Fabric
- The primary canopy material provides shade and protection against harsh conditions.
- Awning fabrics are typically made from durable, weather-resistant materials like polyester or acrylic.
- To improve their durability, they can be treated with waterproof or UV-resistant coatings.
- Frame or poles
- The frame or poles give support and structure to the awning fabric.
- Awning frames are commonly made from lightweight metals such as aluminum or fiberglass.
- Poles are typically collapsible to facilitate storage and setup.
- Guy Ropes and Pegs
- Guy ropes (also known as tie-downs) and pegs are used to secure the awning to the ground.
- Guy ropes are attached to the awning’s corners and fixed with pegs to provide stability in windy conditions.
- Properly tensioned guy ropes prevent the awning from flapping or shifting.
- Awning Rails and Tracks:
- Awning rails or tracks are installed on the camper van to attach and secure the shelter.
- These rails provide a stable mounting point for the awning fabric, allowing for easy deployment and retraction.
- Zipper or Velcro Attachments:
- Zippers or Velcro strips are used to attach the awning fabric to the camper van.
- These attachment points create a secure and sealed connection between the awning and the vehicle, which minimizes drafts and ensures a snug fit.
Additional Components and Accessories:
- Awning Skirt:
- An awning skirt is a fabric panel that hangs down from the bottom edge of the awning to the ground.
- It helps to block drafts, improve insulation, and enhance privacy around the awning area.
- Awning Tensioners:
- Tensioners are used to adjust the pressure of the awning fabric and guy ropes.
- They prevent sagging and ensure a tight and stable setup, especially in changing weather conditions.
How to Fix an Awning to a Camper Van
Fixing an awning to a camper van includes securely attaching the awning to the vehicle’s exterior via mounting hardware and following specific installation steps. Here is a detailed guide on how to fix an awning to a camper van:
Steps to Fix an Awning to a Camper Van
1. Choose a suitable location:
Choose a suitable spot on the side or back of your camper van to install the shade canopy. Make sure there is enough space and clearance for the awning to expand so it offers adequate shelter.
2. Gather the necessary tools and materials:
Gather the supplies that are required for the installation process, such as mounting brackets, screws, nuts, bolts, and a drill or screwdriver.
3. Prepare the mounting surface:
Clean and prepare the mounting surface of the camper van. To make sure that the attachment is secure, you have to clean the surface to remove any dirt, debris, or grease.
4. Attach mounting brackets:
Set up mounting brackets or rails onto the camper van’s exterior. Use the appropriate hardware to securely fasten the mounting brackets to the vehicle’s frame or body panels and don’t forget to pay attention to the manufacturer’s instructions for the proper placement and spacing of the mounting brackets.
5. Install Awning Support Arms:
If the shade structure requires supporting arms or poles, attach them to the mounting brackets. Check that all of the support arms are tightly fastened and properly aligned to guarantee a solid foundation for the shelter.
6. Attach Awning to Mounting Brackets:
Depending on the awning design, lift and position the awning onto the installed mounting brackets. Secure the awning to the brackets using screws, bolts, or locking mechanisms provided with the awning kit. Double-check the alignment and stability of the awning to ensure it is securely fixed to the RV van.
7. Test the installation
Extend and retract the awning to test that it’s functioning and ensure uniform operation. Check if there are any signs of instability, loose fittings, or misalignment that might require adjustments.
8. Secure and seal Connections
Once the awning is installed and tested, secure all the connections and fasteners. Use a sealing agent or silicone caulk to waterproof the surroundings of mounting brackets and attachment points to avoid leaks.
9. Follow the manufacturer’s instructions
Look to the awning manufacturer’s installation manual for particular guidelines and recommendations. Monitor any additional steps or precautions that are outlined in the instructions to ensure a safe and reliable installation.
Tips for Installing an Awning:
Seek Professional Help
If you’re unsure about the installation process, always hire a professional to install the awning correctly.
Ensure Proper Alignment
Align the shade canopy properly with the camper van to prevent issues in operation and clearance.
Regular Maintenance
You have to inspect and maintain the awning regularly to ensure its stability and functionality over time. Doesn’t matter how long you stay on the campsite or how much time you use the awning for shading.
By following these steps and guidelines, you can successfully install an awning on your camper van and ensure a versatile and convenient outdoor shelter for your camping trips. Proper installation is crucial for maximizing the awning’s performance and durability while also improving your camping experience.
How long do camper awnings last?
The lifespan of camper awnings may fluctuate depending on several factors, like the quality of materials, frequency of use, maintenance habits, and exposure to environmental conditions. Generally, a well-maintained camper awning can last anywhere from 5 to 15 years or more.
Following is an in-depth explanation of the factors that influence the lifespan of camper awnings:
Factors Affecting the Lifespan of Camper Awnings:
Quality of Materials
The quality of materials employed in the construction of the awning plays a significant role in its durability. High-quality awnings, generally made from flexible fabrics (such as polyester or acrylic) and sturdy frames (aluminum or fiberglass) are expected to have a longer lifespan.
Frequency of Use
The awnings that are used on a regular basis, especially for extended periods throughout the camping seasons, might experience more wear and tear. Regularly retracting and extending the awning can put strain on the fabric and other moving parts which results in reducing its longevity.
Maintenance Practices
Proper servicing, like regular cleaning and testing, can increase the lifespan of camper awnings. Cleaning the canopy’s fabric to remove dirt, debris, and mildew, along with lubricating the moving parts (such as hinges and retracting mechanisms) can prevent premature degradation.
Exposure to Environmental Conditions
Exposure to extreme weather conditions such as sunlight, rain, wind, and snow may reduce the life of camping vehicle awnings. UV radiation from the sun can also trigger the fabric to lose its color and degrade over time. Heavy rain and moisture can promote mold and mildew growth, which leads to fabric damage if it’s not addressed properly.
Proper Storage
When it’s not in use, you have to store it properly to prevent it from staining or other damage. Before storing, Make sure that the awning is completely dry and the storage surface is also clean and moisture-free because if the surface and or material is not completely dry the growth chances of mold and mildew may increase.
Should you go for an Electric Awning or a Manual?
If you want to decide whether you should go for an electric awning or a manual awning you need to consider several factors related to convenience, cost, maintenance, and personal preferences. Each type of awning has its own advantages and drawbacks, which can influence your decision. Here’s a detailed comparison to help you determine whether to choose an electric awning or a manual awning:
Electric Awning:
Advantages
- Ease of Use:
- Electric awnings can be operated with the push of a button, which can be a beneficial deal for campers with mobility issues or limited physical strength.
- Flexibility:
- Many electric awnings have adjustable extension length settings, which give you precise command over the shade and coverage you want.
Considerations
- Cost:
- It’s obvious that electric canopies are more expensive because of the added motorized components.
- Dependency on Power:
- It requires a power source (typically a 12V battery or 110V AC) to operate, which will sometimes limit its usability in remote locations without access to electricity.
- Maintenance:
- Electric awnings might need more maintenance and possible repairs due to the automated components.
Manual Awning:
Benefits
- Affordability:
- Manual awnings are usually less expensive upfront than electric ones, which makes them a great option for campers with budgets.
- Versatility:
- It can be used in any location without needing the electricity. This means you don’t have to worry about the availability of electric power or carrying electricity generators.
- Simplicity:
- It has a simple operating mechanism, which means you don’t have to rely on complex mechanical or electrical systems.
Considerations:
- Manual Operation:
- It requires manual driving or winding to raise and retract the shade structure, which may be less appealing, especially for larger shelters.
- Physical Effort:
- If you camp in a group it’s not a big problem for you but if you are with family or alone this can be physically exhausting for you.
- Less Adjustability:
- It provides limited control over the expansion of length and modification as compared to electrical awnings.
Personal Preference:
In the end, the choice between an electric awning and a manual awning comes down to personal preference, lifestyle, and camping habits. If you have convenience and ease of use are your top priorities and your budget allows you to spend some money then an electric awning could be a better choice. However, if cost-effectiveness and versatility in different camping environments are more important, a manually operated canopy can be an appropriate option. Before buying anyone carefully weigh the pros and cons of each type of awning based on your specific needs and preferences to make the best decision for your camper van setup.
Conclusion:
In conclusion, camper van awnings are versatile outdoor shelters that improve camping experiences by providing shade, protection, and privacy. When choosing a canopy, consider factors such as dimensions, material, and operation type (electric vs. manual) according to your camping needs and preferences. Proper installation, maintenance, and care are essential for maximizing the lifespan and performance of camper awnings. Whether you opt for an electric awning for ease or a manual awning for affordability, choosing the right awning will significantly improve your camper van trips, creating a comfortable and enjoyable outdoor living space wherever your road trips take you.
FAQs
What is the difference between a canopy and an awning?
A canopy is a self-supporting structure that provides overhead shelter, and it is usually bigger and more permanent than an awning. On the other hand, an awning is attached to a framework or vehicle and extends outward to provide shade and shelter.
What size awning do I need for my camper?
The size of the awning needed for a camper depends on the dimensions of the camper and the desired coverage. Measure the length of your camper’s side where the awning will be attached to determine the appropriate size.
Can you leave a camper awning out in the rain?
Yes, it is usually okay to leave a camper awning out in light rain, but it is suggested that you retract the canopy during heavy rain or hurricanes to prevent damage from pooling water or strong winds.
How much wind can a camper awning withstand?
Most camper awnings are designed to deal with light to moderate winds, typically up to around 10-20 mph. However, it’s important to retract the awning during windy conditions to prevent damage or accidents.
Can you attach an awning to a van without roof racks?
Yes, you can attach an awning to a car without roof racks via alternative mounting options such as suction cup mounts, clamp mounts, or specialized brackets designed for attaching awnings to vehicles without roof racks.
What do you need to attach an awning to the campervan?
To attach an awning to a campervan, you’ll generally need mounting brackets or rails depending on your awning model, appropriate hardware (screws, bolts), tools (drill, screwdriver), along with a sealant or glue for securing the fixing points to the van’s exterior.
You May Also Like:
Pingback: Detaching the Drive Away Awning: Step-by-Step Guide - Ease tent
Pingback: How to Cool a Tent Without Electricity - Zero to Hero
Pingback: Can someone live in a camper on my property? - The Great Outdoors Blog
Pingback: RV Road Rules: What’s Safe and What's Not in a Moving Van?
Pingback: Simple Tricks to Keep Camping Gears Dry - Rainy Camping