

Are you familiar with that musty smell that often greets you when you step inside your travel trailer? If you’ve encountered this unwelcome odor originating from your air conditioner, you’re not alone. In this in-depth manual, we’ll delve into the common culprit behind the musty smell from RV air conditioners and explore practical solutions to eject it for good.
From understanding the causes of bad stinks to step-by-step cleaning procedures and maintenance tips, all the information you seek is right here in this article. Whether you’re gearing up for a road trip or simply want to restore freshness to your RV’s interior, let’s tackle that pesky, unpleasant smell and ensure your travels are filled with nothing but clean, crisp air. Let’s get started.
Table of Contents
Why Does My AC Smell Musty?
If you notice that your camper’s air conditioner is emitting a musky odor, it’s likely to be a result of mold or mildew growth inside the ventilation system. This happens when the moisture combines with dust and other particles, creating an ideal environment for mold spores to grow. So, whenever the air conditioner is turned on, these microbes will circulate throughout your space, which will lead to an unpleasant mildew smell.
Will Musty Smell Go Away?
Unfortunately, the pungent odor won’t typically disappear by itself. You must address the underlying root cause of this by carefully cleaning and disinfecting the AC components. Regular maintenance, including cleaning air filters and coils, and guaranteeing proper ventilation in your residence will surely help to prevent the recurrence of musty odors while preserving a fresh indoor environment.
“During May and June camping, I encounter an annoying problem that persists despite my efforts to resolve it.” In the end, I got the idea that I should seek help from a professional friend who would help me by fixing my AC with his expertise.”
So, if you are experiencing the same issue, then I suggest you take it to a skilled person for proper inspection and repair, which might be needed to resolve the issue fully.
How Do You Check for Mold in an RV?
Checking for mold in your RV air conditioner involves a thorough inspection to identify any signs of mold growth or moisture accumulation. Here’s a detailed guide on how to check for mold in your RV air conditioner:
Visual Inspection:
Visual Inspection begins by visually inspecting the interior components where mold can thrive, like parts that are prone to moisture buildup. Check inside the unit’s air intake, around vents, and also inside the cooling coils. This microbe often appears in dark spots or in patches that look like dirt or grime.
Check for Musty Odor:
The appearance of mold can frequently be detected by a musky odor. If you observe a persistent musty smell when turning on the air conditioner, it might be due to mold or mildew growth in the unit.
Inspect Air Filters:
As I mentioned, Inspect your conditioner filter systems. That means remove them from your van AC unit and visually check for dirt, debris, or signs of any bacteria accumulation. After removing, clean, or replace clogged filters to maintain proper airflow and prevent mold growth that results from trapped fluid and organic matter.
Use a Flashlight:
You can also use a flashlight to get aid when examining dark or hard-to-reach areas within the AC, such as behind panels or inside ductwork. By checking these parts, you can identify any signs of mold growth or moisture that might not be visible under normal lighting conditions.
By following these steps, you can effectively check for mold in your RV air conditioner and take appropriate measures to address any issues to ensure a healthy and comfortable indoor environment during your travels.
Is there a device that detects mold?
Yes, there are a few devices that are specifically designed to detect mold in indoor environments. One common type is a;
Mold Test Kit
This kit contains test plates or swabs that you can use to collect samples from suspected microbial areas. Then, you sent these samples to a laboratory for analysis to determine the presence and type of mold present.
There are also some electronic devices like
Mold Detectors or Moisture Meters
These electric devices can help you to identify parts of high humidity or moisture where bacteria are likely to grow. These devices provide possible readings that indicate conditions that will be friendly for microbial growth and that allow you to take preventive steps before the mold bacteria becomes a significant issue.
If you have doubts that your AC has certain growing mold chances, I suggest you use these detection methods because they can provide valuable insights into the extent of the problem and guide proper cleanup procedures to ensure a healthy indoor environment.
Does a musty smell always mean mold?
Not definitely. While a musty smell can often indicate the presence of mold, it does not mean that there is guaranteed a habitat for mold. Musty odors can also be caused by other factors such as stagnant water, mildew, or even certain materials emitting odors when exposed to moisture. Sometimes, the stench might come from outside sources, such as wet outdoor air entering.
Proper Maintenance of RV Air Conditioners
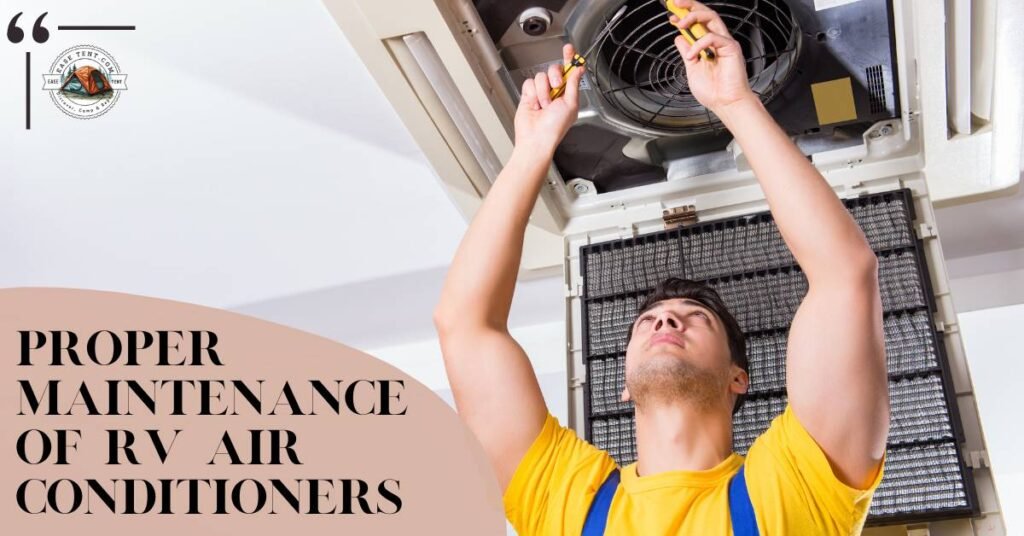
How do I maintain my RV air conditioner?
- Regularly Clean Air Filters:
- Clean or replace the air filters at least once a month or as needed. Because dirty filters can restrict the flow of air and reduce the efficacy.
- Inspect and Clean Evaporator Coils:
- Inspecting and cleaning the evaporator coils is important for maintaining your RV air conditioner’s efficiency. Start by accessing the evaporator coils (located inside the unit) and check for any foreign object buildup. Use a mild detergent mixed with water to gently scrub the coils to guarantee they are free from contaminants that may affect air circulation and cooling performance. This simple maintenance task helps improve air quality and optimizes your air conditioner during your trip.
- Clean and Straighten Fins:
- Cleaning and straightening the fins on your RV air conditioner’s exterior unit will produce more efficient air circulation. Start by gently brushing the fins with a fluffy brush or fin comb to remove any soil, dust, or debris interfering with airflow. Aligning bent fins with a fin comb improves air circulation, which enhances the overall performance and cooling efficiency of your cooling system while traveling.
- Check and Clear Drainage System:
- Checking and clearing the drainage system of your RV air conditioner is vital to prevent water buildup and potential leaks. Start by locating the condensate drain line usually found near the evaporator coils. Use a wet/dry vacuum or a small brush to remove buildup or clogs from the drain line. A clean drainage system helps the water drain from the unit properly. Also, it will reduce the risk of moisture-related issues like mildew bacteria growth and water damage inside your RV.
- Inspect Seals and Gaskets:
- Don’t forget to check for worn or damaged seals and gaskets around the air conditioner unit. By replacing damaged components you ensure that there’s no possible air leak.
How often should you clean your RV AC?
You should clean your vehicle’s air conditioning unit regularly to maintain its optimum efficiency and air purity. A sensible rule of thumb is to disinfect or examine the air conditioner components, such as filters and coils, at least once a month during times of heavy use, especially in hot and humid climates.
Additionally, Scheduling professional routine service for your motor home air conditioner involves hiring a qualified technician to thoroughly inspect, clean, and tune up the entire system. This guarantees that all components work efficiently and reduces the risk of unexpected breakdowns while traveling. Regular professional maintenance prolongs the lifespan of your cooling system and maintains optimal performance during your camping or caravan adventures.
It demands a little bit more money, but it’s the most effective technique for improving your HVAC health.
Can you clean AC vents yourself?
Yes, you can clean AC vents yourself with the right tools and techniques.
How do I clean my RV AC vents?
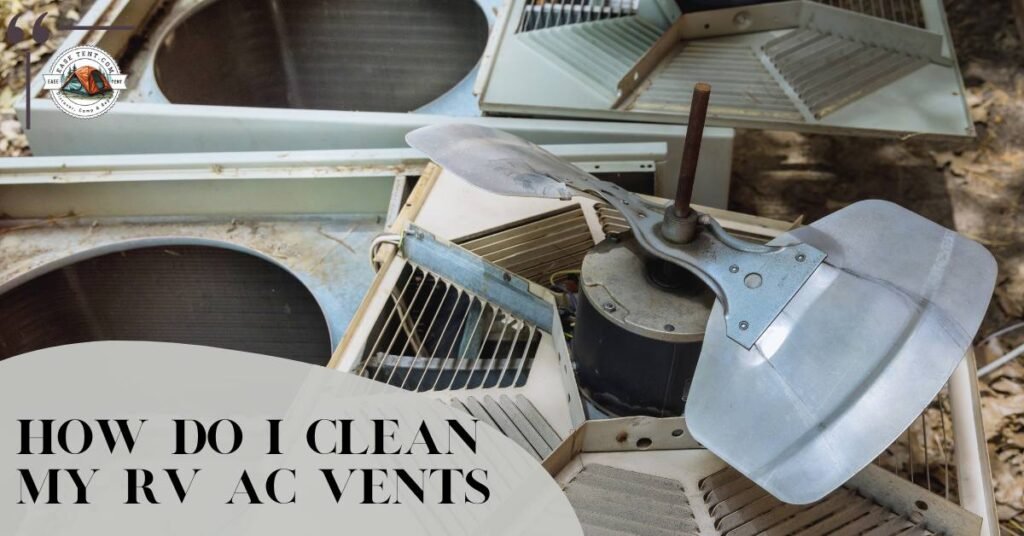
What you’ll need
- Vacuum cleaner with a brush attachment
- Soft brush or cloth
- Mild detergent
- Water
- Small brush or toothbrush
Procedure
- Turn off the AC:
- First, don’t forget to switch off your AC before cleaning to avoid particles and dirt from circulating.
- Remove Vent Covers:
- Carefully remove the vent covers from the ceiling or wall. Some covers may snap off easily, whereas others might require a screw to unscrew.
- Vacuum the Vents:
- Use a vacuum cleaner with a brush attachment to gently remove dust and other particles from inside the vents. Particularly focus on corners and edges where dirt is likely to accumulate.
- Clean Vent Covers:
- Wash the vent covers in a sink or tub with a mild detergent and water solution. Use a soft brush or cloth to scrub away any dirt or filth. Rinse carefully and allow them to air dry completely before reinstalling.
- Clean Inside the Vents:
- Use a tiny scrubber or toothbrush to clean inside the vents, reaching as far as possible to remove persistent dirt or mold buildup. Be gentle to prevent damaging the vent gaps.
- Reinstall Vent Covers:
- Once everything is clean and dry, reinstall the vent covers securely back into place.
Can I clean AC coils myself?
Yes, you can clean AC coils yourself at your home by using proper tools and techniques.
How to clean RV air conditioner coils?
Listed below is the method I use for cleaning AC coils, and I can confidently say that you can also make them spotless by doing the same process. Let’s dig into it;
- Turn off the Power:
- Before cleaning, ensure the power to the air conditioner is turned off at the breaker or disconnect switch.
- Access the Coils:
- Remove any covers or panels to access the evaporator and condenser coils. They are usually located inside the RV air conditioner unit.
- Vacuum First:
- Use a vacuum cleaner with a soft brush attachment to gently remove loose dirt, dust, and debris from the coils. This helps prevent pushing dirt further into the coils during cleaning.
- Apply Coil Cleaner:
- Use a commercially available coil cleaner or a mixture of mild detergent and water to spray onto the coils. Allow the cleaner to sit for a few minutes to loosen dirt and grime.
- Scrub Gently:
- Use a soft brush or coil cleaning brush to smoothly scrub the coils. Work from top to bottom to avoid bending the delicate fins.
- Rinse with Water:
- Carefully rinse the coils with water using a spray bottle or hose. Be cautious not to use excessive water pressure, which can damage the coils.
- Repeat if Necessary:
- For extremely dirty coils, you might have to repeat the cleaning process to ensure the complete removal of dirt and soil.
- Allow to Dry:
- Let the coils air dry completely before replacing any covers or panels and restoring power to the air conditioner.
How do I get rid of mold in my RV air conditioner?
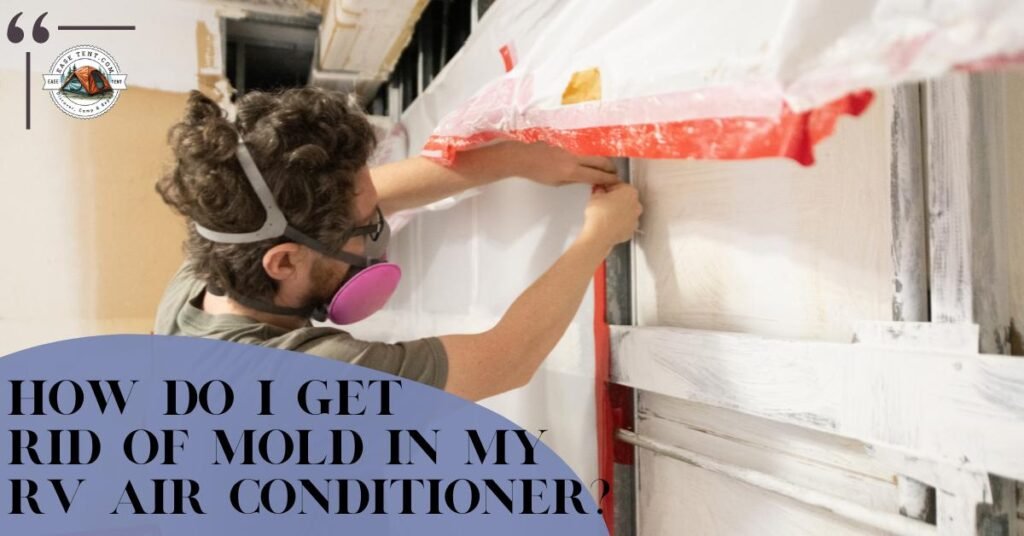
To remove mold from your trailer air conditioner, follow these steps: I will be using the same procedure to clean my AC;
Turn off the Power
Safety is paramount when working with electrical appliances. Switch off the power to your RV air conditioner at the breaker or disconnect the switch to avoid any risk of electric shock while cleaning.
Access the Interior Components
Remove any access panels or covers needed to reach the interior components of the air conditioner, such as the evaporator coils and drain pan. It also enables you to carefully examine and clean those parts where algae may be present.
Seek Mold Habitation
Use a light to carefully inspect the interior surfaces for visible mold growth. Look closely at the evaporator coils, fins, and drain pan. Mold often appears as dark spots or patches.
Use a Mold Cleaner or Vinegar Solution
Prepare a cleaning solution using equal parts white vinegar and water or use a commercial mold cleaner. Both vinegar and commercial cleaners are effective at killing mildew microbes and removing stains caused by mold.
Scrub Gently
Use a gentle scrubber or cloth with the cleaning solution to gently scrub away the mold from the affected surfaces. Be careful not to apply too much pressure, especially on fragile parts like fins, to avoid damage.
Rinse and Wipe Clean
After scrubbing, rinse the cleaned areas with clean water to remove any residual vinegar solution or mold cleaner. Wipe down the surfaces with a clean, dry cloth to ensure they are completely dry.
Clear Drainage System
Ensure the condensation drain line is free from mold or other bacteria and debris. Use a wet/dry vacuum or a tiny sponge to clear clogs that might obstruct proper drainage and lead to mold growth.
Allow to Dry Completely
Allow the interior components of the air conditioner to air dry completely before reinstalling any covers or panels. This helps prevent moisture buildup and discourages future bacterium growth.
What kills mold better bleach or vinegar?

Both bleach and vinegar are effective at killing mold, but they have different properties and considerations:
Bleach
This is a (sodium hypochlorite) strong disinfectant that effectively kills mold on hard, non-porous surfaces. It can quickly remove mold and sanitize the surfaces. However, bleach can emit strong fumes, which are acidic and aggressive and may not be suitable for all places. It is essential to use bleach in a well-ventilated area and follow safety guidelines.
Vinegar
Vinegar (acetic acid) is a milder and more natural option for killing molds. It has antifungal properties that are capable of preventing mold growth. Vinegar is safer to use also releases less harsh gases compared to bleach, and is suitable for porous surfaces. However, vinegar may not be as fast-acting as bleach and may require multiple applications for stubborn mold.
Ultimately, the choice between bleach and vinegar depends on the surface being treated and personal preference. Bleach is often preferred for non-porous surfaces and quick mold removal. For safer and more environmentally friendly mold removal, vinegar can be a good alternative, especially on porous surfaces where bleach may not be effective and suitable. I repeat don’t forget to use caution and proper ventilation when using either bleach or vinegar for mold cleaning.
“If you ask me which one I prefer to use, my answer is vinegar. Vinegar not only kills many types of germs but also cleans surfaces smoothly without leaving any stains. So I will also recommend you to go with vinegar.”
Can I leave the vinegar on the mold overnight?
Yes, you can leave the vinegar on the mold overnight for more effective mold removal. Allowing vinegar to remain on the affected areas overnight can give it more time to penetrate and kill the mold spores. However, be careful when using vinegar on certain surfaces, especially porous materials or in sensitive finishes, as prolonged exposure to vinegar may cause fading or damage. It’s recommended to test a small, hidden area first and monitor the effects before leaving vinegar on mold overnight.
Why isn’t vinegar killing mold?
While vinegar is known for its effectiveness in killing mold by disrupting the mold’s cell structure and inhibiting its growth, it may not always fully eliminate mold in certain situations. If you don’t achieve the desired results after using vinegar, there could be several reasons why it didn’t work effectively:
Concentration
Vinegar typically contains around 5% acetic acid, which may not be strong enough to kill certain types of microbes, especially if the mold infestation is severe.
You can repeat the method multiple times so that it might work.
Surface Penetration
Vinegar may not penetrate deeply into porous materials where mold can grow beneath the surface layers. This can limit its effectiveness in completely eradicating mold.
You’ll need to give it some time by leaving it overnight or even longer as required.
Type of Mold
Some molds are more resistant to vinegar than others. Certain types of microbes may require stronger disinfectants or professional treatment for complete removal. So, you may also need to contact a skilled person.
Environmental Factors
Mold growth can be influenced by environmental conditions such as humidity levels and temperature. Simply applying vinegar may not address underlying moisture issues that contribute to mold growth.
Make Your AC to Smell Fresh

What can I do with my AC to smell good?
Here are some best tips to keep your RV air conditioner smelling good:
- Use Essential Oils:
- Using essential oils is a natural way to add pleasant scents to your RV’s air conditioner.
- Simply add a few drops of your favorite essential oil, such as lavender, citrus, or eucalyptus, to a cotton ball or diffuser near the air intake of your AC unit.
- When the air conditioner operates, it will distribute the aroma throughout the camping vehicle, which produces a refreshing and inviting atmosphere.
- Aromatic oils not only mask scents but also offer aromatherapy benefits, promoting relaxation and wellness during your travels.
- Experiment with different essential oil scents to find your favorite and enjoy a personalized, pleasant-smelling RV environment.
- Keep RV Clean and Dry:
- Keeping your RV clean and dry is essential for ensuring a good smell from your AC.
- Regularly cleaning surfaces, floors, and upholstery helps prevent dirt and bacteria buildup, which may lead to bad odors in the air conditioning system.
- Additionally, keeping the RV dry by addressing leaks quickly and using a dehumidifier periodically helps minimize moisture-related odors and promotes a fresh-smelling interior.
- Avoid Cooking Strong-Smelling Foods Inside:
- Cooking strong-smelling foods like fish or spices inside the motor home can leave remaining smells in the air conditioner.
- So, it’s best to cook outdoors because it also gives an ideal vibe and leaves no bad smell in your camping van.
- Monitor Humidity Levels:
- Use a dehumidifier to maintain optimal humidity levels inside your RV.
- Excess humidity can contribute to musty stinks and mildew growth.
- Inspect for Pet Odors:
- Inspecting for pet odors is essential when ensuring a fresh-smelling RV air conditioner.
- Regularly clean and deodorize areas where pets spend time, such as bedding, cushions, and floors.
- Make use of pet-safe cleaning products to eradicate smells effectively.
- Additionally, consider using air fresheners or odor-neutralizing products specifically designed for pet odors to keep your RV smelling clean and inviting.
- Use Natural Odor Absorbers:
- Using natural odor absorbers is a great way to handle unpleasant smells in your Winnebago without using harsh chemicals.
- Materials like activated charcoal, coffee grounds, baking soda, or zeolite can effectively absorb and neutralize fragrances by trapping odor-causing particles in their porous surfaces.
- Simply place bowls or sachets of these natural absorbents in areas like near air vents or cabinets to help freshen the air.
- Replace or refresh these scent absorbers regularly to maintain their effectiveness and keep your coach smelling clean and inviting during your adventures.
- Consider UV Air Purification:
- Consider using UV air purification in your RV’s air conditioner to help eliminate odors and improve indoor air quality. UV air purification systems use ultraviolet light to kill bacteria, viruses, mold spores, and other airborne contaminants that can cause unpleasant odors.
- This technology is effective at neutralizing odors at the source and can be a valuable addition to your RV’s HVAC system for maintaining a clean and fresh-smelling environment.
- UV air purification is safe, energy-efficient, and helps create a healthier atmosphere inside your RV during your outdoor travels.
Should RV air conditioners be covered in the winter?
Yes, covering RV air conditioners during the winter months is recommended to protect them from debris, moisture, and potential damage caused by snow, ice, or freezing temperatures. Covering the air conditioner with a specially designed cover helps prevent rust, corrosion, and dirt buildup, which can extend the lifespan of the unit. Be sure to use a cover that is breathable and specifically made for RV air conditioners to allow proper ventilation and prevent moisture accumulation inside the appliance. Regularly inspect and clean the AC unit before covering it for winter storage to ensure optimal performance when you’re ready to use it again.
Let’s take a look at Refrigerants
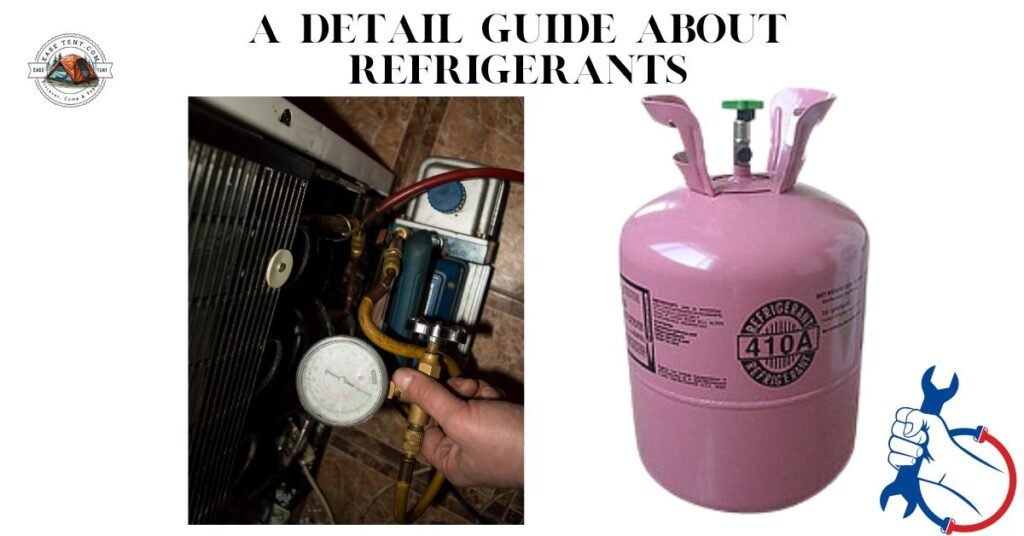
How do I know if my RV AC needs a Refrigerant?
- Warm Air Coming from Vents:
- If the air blowing from your AC vents is warmer than usual, it could indicate a low refrigerant level.
- Inadequate Cooling:
- If your AC is running continuously but fails to sufficiently cool the camper interior, it might be a sign of low refrigerant.
- Visible Frost or Ice Buildup:
- Excessive frost or ice formation on the evaporator coils can also be a sign of low refrigerant levels.
- AC Cycling Frequently:
- If the AC compressor turns on and gets off frequently (short cycling), it could also be due to inadequate refrigerant levels.
- High Energy Bills:
- If you feel an unexpected spike in energy consumption without improved cooling performance, it may be attributed to a shortage of refrigerant.
If you notice any of these signs, it’s advisable to have your RV AC system inspected by a qualified HVAC technician. They can diagnose the problem, check refrigerant levels, and perform any necessary repairs or recharge the refrigerant to ensure your AC operates efficiently and effectively.
Which refrigerants are the best?
The choice of refrigerant for trailer air conditioners has evolved over the years due to environmental considerations and regulations. As of current standards and practices:
- R410A (Puron):
- This refrigerant is commonly used as a replacement for R22 (Freon) in newer RV air conditioning systems. R410A is more environmentally friendly and has better heat transfer properties.
- R134a:
- Often used in automotive air conditioning systems, R134a is also suitable for some smaller RV AC units. It is non-ozone-depleting and has a lower environmental impact compared to older refrigerants like R12.
- R32:
- Another emerging refrigerant that is gaining popularity due to its low global warming potential (GWP) and good performance characteristics.
- R290 (Propane):
- In some cases, propane (R290) is used as a refrigerant in specialized RV AC units. Propane is considered environmentally friendly but requires specific handling and safety considerations. So, that’s why I will rank this at the 4th spot in my best list.
Choosing the “best” refrigerant depends on factors such as system compatibility, environmental impact, efficiency, and safety. It’s essential to consult with HVAC professionals or RV manufacturers to determine the most suitable refrigerant for your specific camper air conditioning system.
What replaced Freon?

The best alternative for Freon (R22) in modern HVAC systems is generally considered to be R410A (also known as Puron). R410A is chlorine-free, has a significantly lower impact on the ozone layer compared to Freon, and is widely used in newer air conditioning systems for its environmental friendliness and efficiency. It has become the standard refrigerant choice for many HVAC manufacturers as a more sustainable alternative to Freon. However, it’s important to consult with HVAC professionals to ensure compatibility and compliance with regulations when choosing a refrigerant for your specific HVAC system.
In 2023, when I decided to upgrade my camper’s AC system to use Puron refrigerant, I was pleasantly surprised to find it at a more affordable price than I expected. This was partly because Puron has become increasingly popular due to its environmental benefits, which lead to greater production and availability in the market. As more people switched from older refrigerants like Freon to Puron, the increased demand for Puron helped stabilize prices and even bring them down.
What does Puron smell like?
Puron (R410A), like most refrigerants, is odorless. It does not have a distinct smell or odor when used in HVAC systems. The lack of odor is a typical characteristic of refrigerants used in air conditioning and refrigeration applications. Therefore, when Puron is properly installed and functioning in an HVAC system, it should not release any noticeable smell or fragrance into the air.
If you detect unusual odors coming from your HVAC system, it could be warning signs of other issues, such as bacteria, mildew, or contaminants, which should be inspected and addressed by a qualified HVAC technician, as I mentioned above.
Is puron toxic to breathe?
Puron (R410A) is not toxic to breathe under normal conditions when used in air conditioning units. However, it’s important to avoid direct vapor inhalation or exposure to high concentrations. In case of a leakage, investigate the spot and ensure proper handling and repair.
How much does it cost to put refrigerant in a caravan?
The cost to recharge or refill refrigerant in a caravan’s air conditioning system can vary depending on several factors, including the type of refrigerant needed (such as Puron/R410A), the amount of refrigerant required, and any additional labor or service charges. On average, the cost to put refrigerant in a caravan’s AC system can range from $150 to $500 or more, depending on the complexity of the job and local service rates. It’s recommended to contact your local HVAC professionals or service providers for specific pricing estimates based on your caravan’s make, model, and refrigerant needs.
Can I put refrigerant in my van AC myself?
I would not suggest you add refrigerant to your van’s AC system yourself without prior experience or training due to safety concerns and regulatory compliance. Here’s why:
- Safety Concerns:
- Handling refrigerants can be hazardous without proper training and equipment. Refrigerants are pressurized and can cause injury if mishandled or released improperly.
- Regulatory Compliance:
- In many regions, handling refrigerants requires certification and adherence to environmental regulations. DIY attempts may lead to legal issues and environmental harm.
- System Compatibility:
- Adding refrigerant without understanding the specific needs of your AC system can result in overcharging, undercharging, or other performance issues, which may affect you financially.
It’s advisable to hire a licensed HVAC technician or automotive AC specialist to inspect and service your van’s AC system. They have the expertise, tools, and certifications needed to safely handle refrigerants and ensure the proper performance of your AC system.
FAQs
Does RV AC use a lot of electricity?
RV air conditioners can use a significant amount of electricity, especially when running continuously in hot weather. It’s essential to monitor energy usage and you can also utilize alternative power sources like shore power or generators when needed. This will surely reduce your electricity consumption.
Is there any difference between a musty and moldy smell?
Yes, a musty smell usually indicates dampness and stagnant air, whereas a moldy smell specifically indicates the presence of mold or other microbes that originate from moisture and organic material.
Is it OK to leave the RV AC on all the time?
Leaving your RV AC switched on continuously for cooling purposes is generally safe, but you should also consider your financial situation, energy efficiency, and system maintenance. Using programmable thermostats or adjusting settings when away can help conserve energy.
Are RVs prone to mold?
Yes, RVs can be susceptible to mold growth due to their confined spaces, fluctuating temperatures, and potential for moisture buildup. However, you can prevent mold and mildew by maintaining regular cleaning of surface areas, ensuring proper ventilation, and controlling moisture levels inside your camper
What does a musty smell indicate?
A musty smell typically indicates the occurrence of mold or mildew, which can develop due to excess moisture and inadequate ventilation.
Is Freon illegal?
The use of Freon (R22) in new HVAC systems has been restricted and phased out in multiple nations due to environmental issues. While it is not illegal to possess or use existing Freon supplies, its production and import for new installations is banned or heavily regulated in countries such as the United States and the European Union.
Is Freon banned now?
Freon (R22) started to be banned for new production and import around 2010 in countries like the United States and the European Union. Regulatory organizations such as the Environmental Protection Agency (EPA) and the European Commission implemented the restrictions to encourage using more environmentally friendly alternatives. Currently, the use of Freon in new air conditioning units is generally not allowed or highly restricted.
You may also like
How do I Prepare For Winter Camping
What food to take camping without a fridge
Simple Tricks to Keep Camping Gears Dry – Rainy Camping
Pingback: Camper AC Fan Not Working - Ease tent
Pingback: How to Not Smell Bad While Camping? "My Own Experience"
Pingback: How to keep a camping toilet from smelling - The Great Outdoors Blog
Pingback: RV Road Rules: What’s Safe and What's Not in a Moving Van?