Are you experiencing frustration with your Camper AC fan not working as it should? This could be a symptom of underlying compressor or condenser problems. In this guide, we’ll explore common signs that indicate issues with these critical components of your AC system. Recognizing these signs early can help you address problems promptly and ensure your RV stays cool and comfortable during your travels. Let’s delve into the key indicators of compressor or condenser issues and what steps you can take to diagnose and resolve them effectively.
Table of Contents
Understanding RV Air Conditioning Issues
Why is my RV AC unit humming but the fan not running?
If your RV AC unit is humming but the fan is not running, several potential issues could be causing this problem:
Faulty Capacitor
The capacitor in your AC unit helps start the fan motor. If the capacitor is defective or has failed, even if it has quality, the fan motor may not receive the necessary electrical boost to start running, which results in a humming sound without the fan turning.
Stuck Fan Motor
The fan motor itself could be stuck or seized due to debris, corrosion, or mechanical issues. This can prevent the fan from spinning even if the motor is receiving power.
Electrical Issues
There may be electrical issues in your residential area such as a wiring problem or a blown fuse that is preventing the fan from operating correctly.
If you are unsure about electrical issues with your RV AC unit, you can perform a basic check by ensuring that other home electrical appliances are functioning properly. If these other machines are not turning on or experiencing issues, it could indicate a broader electrical problem in your RV’s power supply or electrical system.
Why does my RV AC shut off?
Numerous factors could trigger this issue if your mobile home AC unit shuts off unexpectedly. Here are some common reasons why your camper air conditioner may shut off:
Overheating
When an RV AC unit overheats, it may result in unexpected shutdowns to avoid destruction. Thermal overload is frequently triggered by limited airflow or low refrigerant levels. Restricted airflow caused by clogged filters or obstructions can make the ventilation system operate more diligently, generating excess heat. Low refrigerant levels can also lead to inadequate air conditioning, which causes components to overheat and trigger automatic shutdowns for safety.
Regular maintenance, including cleaning the air filters and monitoring the cooling fluid levels, assists in preventing overheating issues and ensures optimal AC performance.
Frozen Evaporator Coils
If the evaporator coils freeze due to insufficient airflow or any other issue, it can result in the air conditioning unit shutting off until the ice melts.
High Ambient Temperature
Significant outside temps may seriously affect the performance of a caravan air conditioning (AC) device. When the outdoor temperature is excessively high, the AC system might find it difficult to eliminate heat efficiently, which leads to reduced cooling efficiency. This may end up in the air conditioning system running continuously or cycling on and off frequently as it tries to maintain the ideal indoor temperature.
Additionally, prolonged exposure to high temperatures can strain the air conditioner’s compressor and other components, possibly leading to overheating and system shutdowns for safety.
Low Voltage or Power Supply Issues
Low voltage or power supply issues might also cause Motorhome cooling systems to fail because they aren’t getting enough electricity. This may contribute to problems such as starting the AC, irregular functioning, or sudden shutdowns. Low voltage can also cause the air conditioning compressor to overwork, which results in higher energy consumption along with potential damage. Using a reliable power source that fulfils the voltage needs of the AC unit, as well as voltage regulators or spike protectors, can assist in stabilizing the power supply and safeguard the AC system from harm caused by low voltage or fluctuations.
Defective Start Capacitor
A faulty start capacitor in a cooling system can prevent the compressor from operating correctly. As a result, the air conditioning system fails to cool or execute effectively. Constant clicking sounds can identify a faulty capacitor during startup attempts, the compressor not running even with a power supply, or frequent circuit breaker tripping. To fix this issue, contact a mechanic to verify the functioning of the capacitor with a multimeter and replace it if necessary to bring back regular functionality to the AC unit.
Troubleshooting Common RV AC Problems
Why Is RV AC not blowing cold air?
When your RV AC is experiencing “No Cooling” as a problem, it can be frustrating, especially during hot weather. Some factors could be initiating this issue:
- Thermostat Settings:
- Start by checking the thermostat settings. Ensure that the thermostat is set to “Cool” mode and the temperature is set lower than the current room temperature.
- Air Filter:
- A dirty or clogged air filter can restrict airflow and decrease cooling efficiency. Inspect and clean the air filters properly or replace them if necessary.
- Refrigerant Levels:
- Low refrigerant levels due to leaks can prevent the AC from cooling properly. Contact a professional technician to check and recharge the refrigerant if needed.
- Condenser Coils:
- Dirty or blocked condenser coils can hinder heat transfer, affecting cooling performance. Clean the condenser coils to improve efficiency.
- Compressor Issues:
- Faulty compressor components, such as a malfunctioning capacitor or compressor relay, can lead to inadequate cooling. Have the compressor checked by a technician.
- Electrical Problems:
- Check for tripped circuit breakers, blown fuses, or loose electrical connections that could be affecting the AC’s operation.
- Outdoor Unit Obstructions:
- Ensure that the outdoor unit (condenser) is free from debris, vegetation, or other obstructions that can obstruct airflow.
Compressor Problems
How do you know if your Compressor is faulty?
Compressor problems in an air conditioning (AC) system are important and have major work in operating AC, that’s why if the compressor is not top-notch it can lead to various issues and symptoms, impacting the overall cooling performance. Signs of compressor problems include:
- Failure to Start:
- If the compressor in the AC fails to work, major chances are that the compressor may fail to start, which results in no cooling or inadequate cooling.
- Loud or Unusual Noises:
- Grinding, banging, or rattling common noises coming from the compressor can indicate mechanical issues.
- Irregular Cooling:
- The AC may exhibit intermittent cooling, with the compressor cycling on and off unexpectedly.
- Reduced Cooling Capacity:
- If the compressor is bad, The AC system may struggle to maintain desired temperatures and the AC cooling level will be non-uniformed leading to reduced cooling capacity.
- Tripped Breakers or Fuses:
- Electrical issues related to the compressor can cause circuit breakers or fuses to trip.
Is it OK to just replace the AC compressor?
Whether it’s okay to replace the AC compressor depends on several factors, including the age of the air conditioning system, the extent of the compressor damage, and the overall condition of the system. Here are some considerations:
- Age of the System:
- If your AC system is relatively new and the compressor is the only major component showing signs of failure, replacing the compressor alone may be a viable option to restore the cooling function.
- Extent of Damage:
- If the compressor failure has not caused significant damage to other components, replacing the compressor alone can be a cost-effective solution.
- System Efficiency:
- Replacing just the compressor may restore cooling temporarily, but if other components are close to the end of their lifespan or the system is useless, you may encounter further issues in the future.
- Comprehensive Inspection:
- It’s crucial to have a comprehensive inspection of the entire AC system by a professional technician.
- They can assess the overall condition and advise whether replacing the compressor alone is sufficient or if other repairs or replacements are necessary.
- Warranty Considerations:
- Check if the compressor replacement is covered under warranty or if there are extended warranty options for your Air conditioning system.
- This can influence the decision on whether to replace the compressor or consider a full system replacement.
- Long-Term Cost vs. Benefit:
- Consider the long-term cost-effectiveness of replacing just the compressor versus investing in a new, more efficient AC system.
- Newer systems often offer improved energy efficiency and performance.
Ultimately, the decision to replace only the AC compressor should be based on a professional assessment of your specific situation. Consulting with a trusted HVAC technician will provide valuable insights into the best course of action to restore the cooling function and ensure the reliability of your air conditioning system.
Capacitor Failure
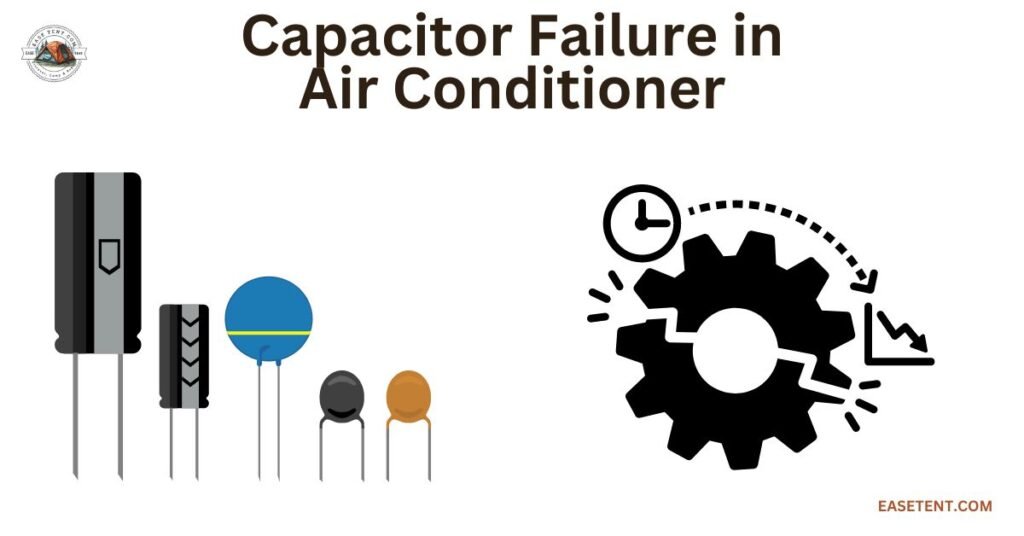
What happens when an AC capacitor fails?
- Compressor Failed to Start:
- A failed capacitor can prevent the compressor from starting up, resulting in no cooling or inadequate cooling.
- Intermittent Operation:
- The AC unit may exhibit intermittent operation, starting and stopping unexpectedly due to capacitor issues.
- Audible Signs:
- You may hear humming or clicking noises coming from the AC unit, indicating capacitor problems.
- Inadequate Cooling:
- Capacitor failure can cause reduced cooling performance, with the AC system struggling to maintain desired temperatures.
- Overheating Components:
- A failing capacitor can lead to overheating of other AC components, potentially causing further damage.
If you notice any of these symptoms, it’s important to have your AC system inspected by a qualified HVAC technician. They can diagnose the capacitor issue and perform the necessary repairs or replacements to restore proper operation and efficiency to your air conditioning system.
Can I replace an AC capacitor myself?
Yes, Replacing an AC capacitor yourself is possible if you have the necessary knowledge, skills, and safety precautions. However, working with electrical components can be hazardous, and proceeding with caution is essential.
Things you’ll need
- Replacement Capacitor
- Insulated Screwdriver
- Safety Gloves and Goggles
- Multimeter
- Adjustable Wrench or Pliers
- Work Light
- Disconnect Tool (Optional)
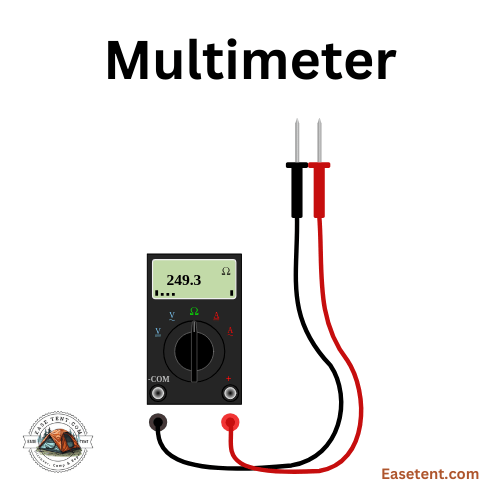
Procedure
If you are going to replace it yourself, then there are important considerations:
- Safety First:
- Before starting any work, ensure that the power to the AC unit is turned off at the circuit breaker or disconnect box to prevent electrical shock.
- Identify the Capacitor:
- Locate the capacitor in your AC unit and identify its specifications, including voltage and microfarad (µF) rating. Ensure that the replacement capacitor matches these specifications. If it’s not then you should don’t perform this task.
- Discharge the Capacitor:
- Use an insulated screwdriver to short the terminals of the old capacitor to discharge any stored electrical charge. This helps prevent accidental shocks during removal.
- Remove the Old Capacitor:
- Carefully disconnect the wires from the old capacitor, noting their positions. Remove the mounting bracket or strap securing the capacitor in place.
- Install the New Capacitor:
- Install the new capacitor in the same orientation and position as the old one. Connect the wires to the corresponding terminals on the new capacitor.
- Test the AC Unit:
- After installation, restore power to the AC unit and test its operation. Observe the compressor and fan motor to ensure they start and run smoothly with the new capacitor.
- Safety Precautions:
- Always wear appropriate safety gear, such as insulated gloves and safety goggles when working with electrical components. If you’re unsure or uncomfortable with the process, it’s safer to hire a professional HVAC technician to replace the capacitor.
Keep in mind that improper handling of electrical components can be dangerous and may lead to equipment damage or personal injury. If you’re uncertain about replacing the AC capacitor yourself, it’s recommended to seek assistance from a qualified HVAC technician who can perform the replacement safely and effectively.
Will my AC run with a bad capacitor?
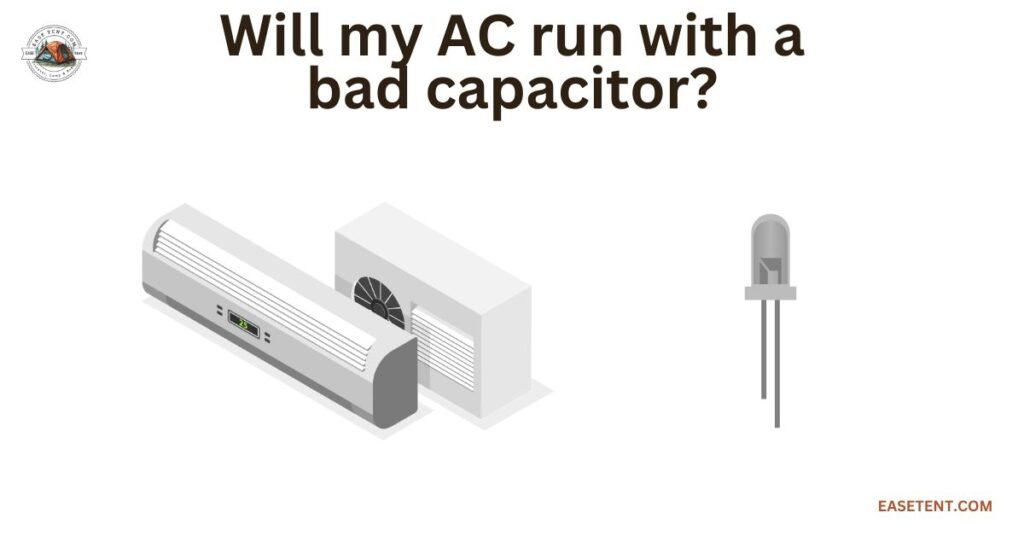
In many cases, an air conditioner (AC) may not run properly or may experience issues if it has a bad capacitor, especially if the bad capacitor is essential for the operation of the AC’s compressor or fan motor. Here’s how a bad capacitor can affect the AC:
- Compressor Starting:
- The capacitor helps start the compressor by providing the initial electrical boost needed to run the motor. If the capacitor is faulty or weak, the compressor may struggle to start, leading to difficulty in cooling or no cooling at all.
- Fan Motor Operation:
- Similarly, the fan motor in the AC unit relies on the capacitor to start and run efficiently. A bad capacitor can prevent the fan motor from operating, resulting in poor airflow or no airflow from the AC vents.
- System Performance:
- A malfunctioning capacitor can cause the AC system to run inefficiently or intermittently. The AC might cycle on and off frequently (short cycling) or fail to operate altogether.
Therefore, if you suspect that your AC has a bad capacitor, it’s advisable to have it inspected and replaced by a qualified HVAC technician. Continuing to run the AC with a faulty capacitor can lead to further damage to other components and potentially result in more costly repairs.
Why are AC capacitors so expensive?’
AC capacitors can be expensive due to the several factors;
- Specialized Components:
- AC capacitors are explicitly designed for use in air conditioning systems and must meet certain specifications, including voltage ratings, capacitance values, and operating temperatures.
- These specialized requirements contribute to manufacturing costs.
- Quality and Reliability:
- High-quality, reliable and durable capacitors typically cost more.
- Air conditioner manufacturers often prioritize reliability to ensure capacitors can withstand the demanding conditions of HVAC applications.
- Manufacturing Complexity:
- The manufacturing process for AC capacitors can be intricate and involve precise assembly techniques to meet industry standards and performance requirements.
- This complexity can drive up production costs.
- Supply and Demand:
- Like many components in the HVAC industry, the pricing of AC capacitors can be influenced by supply and demand dynamics.
- Fluctuations in market conditions or availability of raw materials can impact pricing.
- Warranty and Certification:
- AC capacitors often come with warranties and certifications to guarantee performance and reliability.
- The costs associated with providing warranties and meeting certification standards can contribute to higher prices.
- Installation and Labor Costs:
- In addition to the cost of the capacitor itself, HVAC technicians may charge for labor and installation services when replacing capacitors, adding to the overall expense.
While AC capacitors may seem expensive, investing in quality components and professional installation can help ensure the longevity and efficiency of your air conditioning system. Regular maintenance and timely replacement of capacitors as needed can also prevent more costly repairs down the line and extend the lifespan of your HVAC equipment.
How many years does an AC capacitor last?
The lifespan of an AC capacitor can vary depending on several factors, including usage, environmental conditions, and overall quality of the capacitor. On average, an AC capacitor can be expected to last anywhere from 5 to 15 years. However, capacitors can fail prematurely due to factors such as:
- Usage Patterns: AC units that run frequently or for extended periods may put more strain on the capacitor, potentially leading to a shorter lifespan.
- Environmental Factors: High temperatures, humidity, and exposure to dust or debris can contribute to capacitor degradation over time.
- Quality of the Capacitor: The quality and brand of the capacitor can influence its durability and lifespan. Higher-quality capacitors may last longer and perform more reliably.
- Electrical Issues: Voltage spikes or fluctuations in the electrical supply can stress the capacitor and contribute to premature failure.
- Maintenance and Care: Regular maintenance, including cleaning of condenser coils, checking refrigerant levels, and replacing air filters, can help extend the lifespan of the capacitor and overall Air conditioning system.
Additional Maintenance Tips
How to Grease RV AC Fan Motor?
Greasing a trailer AC fan motor is a maintenance task that can help prolong the life of the motor and ensure smooth operation. Here’s a general guide on how to grease an RV AC fan motor:
- Turn off Power:
- Before beginning any work, turn off the power to the RV AC unit at the breaker panel to prevent electrical accidents.
- Access the Fan Motor:
- Remove the cover or access panel to reach the AC fan motor.
- This may involve unscrewing bolts or removing clips, depending on the AC unit’s design.
- Locate Grease Fittings:
- Check the fan motor for grease fittings, which are typically located near the motor shaft.
- These fittings are designed to apply grease to lubricate moving parts.
- Apply Grease:
- Attach a grease gun to the grease fitting and pump a small amount of grease into the fitting.
- Continue pumping grease until fresh grease emerges around the motor shaft.
- Rotate the Fan:
- After greasing, manually rotate the fan blades a few times to distribute the grease evenly around the motor bearings.
- Inspect and Clean:
- While the access panel is open, inspect the fan blades and motor for any debris or dirt buildup.
- Use a soft brush or cloth to gently clean if necessary.
- Replace Cover and Test:
- Once the motor is greased and everything is inspected and cleaned, replace the access cover securely. Restore power to the AC unit and test the fan to ensure smooth operation.
Regular Maintenance: Greasing the fan motor should be part of regular camper AC maintenance. Check the manufacturer’s recommendations for the greasing frequency based on usage and environmental conditions.
Step-by-Step: Installing a New Fan in Your RV Air Conditioner
Step-by-step guide for installing a new fan in your RV air conditioner:
- Gather necessary tools and materials.
- Turn off power to the RV air conditioner.
- Remove the access panel or cover to access the fan assembly.
- Disconnect the electrical connections to the old fan motor.
- Remove the screws or bolts securing the old fan motor in place.
- Take note of the orientation of the old fan blades.
- Carefully remove the old fan motor and blades from the unit.
- Install the new fan motor in the same orientation as the old one.
- Secure the new fan motor in place with screws or bolts.
- Reconnect the electrical connections to the new fan motor.
- Attach the new fan blades to the motor shaft.
- Replace the access panel or cover.
- Turn on the power to the RV air conditioner and test the new fan for proper operation.
- Ensure that the fan blades are spinning correctly and producing airflow.
- Monitor the RV air conditioner for any unusual noises or issues during operation.
- If everything is functioning properly, the installation is complete.
During a camping trip in a small California village (Pico Rivera), I decided to install a new fan in my RV air conditioner. As I began the installation and removed the access panel, I realized I had forgotten a vital tool for detaching the electrical connections. Luckily, a friendly fellow camper nearby had a required instrument and volunteered to lend it to me.
Just as I was going to secure the new fan motor, a strong gust of wind blew through the campsite, nearly destroying the access panel. With my camping mates’ help, we secured the panel and completed the installation correctly.
After everything had been set up, I switched on the RV ventilator, feeling relief as the new fan began spinning silently, giving much-needed cooling inside the camper during the hot day.
“This event taught me essential lessons about resourcefulness and adaptation while camping in distant areas”.
Extra Guide

Where is the RV AC reset button?
The location of the reset button for an RV air conditioner can vary depending on the model and manufacturer. However, in many cases, the reset button is located on the control panel of the air conditioner unit itself.
To locate the reset button:
- Access the Control Panel: Remove any cover or panel that provides access to the controls of the RV air conditioner.
- Inspect the Control Panel: Look for a small button labelled “Reset” or “R” on the control panel. It may be located near other operational buttons or indicators.
- Press and Hold the Reset Button: If you find the reset button, press and hold it for a few seconds to reset the air conditioner. This action may clear any minor issues or faults that are causing the AC unit to malfunction.
If you are unable to locate the reset button on the control panel, consult the owner’s manual or documentation provided with your RV air conditioner for specific instructions and details on the reset procedure. Additionally, if the air conditioner continues to experience problems or does not respond to resetting, it’s advisable to contact a professional RV technician for further inspection and repairs.
Should I turn off my AC if the fan isn’t spinning?
If you notice that the fan of your air conditioner isn’t spinning, it’s generally advisable to turn off the AC unit to prevent further damage. Here’s why:
- Prevent Overheating: The fan plays a crucial role in dissipating heat generated by the AC system. If the fan isn’t spinning, the system may overheat, potentially causing damage to the compressor or other components.
- Avoid Further Issues: Continuing to run the AC without the fan operating can lead to inefficient cooling and may worsen the underlying problem causing the fan to malfunction.
- Safety Precaution: Turning off the AC reduces the risk of electrical issues or component failure associated with the fan not spinning.
How long should RV AC last?
The lifespan of an RV air conditioner can vary depending on several factors, including usage, maintenance, and environmental conditions. On average, a well-maintained van air conditioner can last anywhere from 5 to 15 years. Proper maintenance, such as regular cleaning of filters, coils, and components, can help extend the lifespan of the AC unit.
Factors that can affect the lifespan of an RV AC include:
- Frequency of use: Units that are used frequently may experience more wear and tear over time.
- Maintenance: Regular maintenance, including cleaning and servicing, can prevent issues and prolong the lifespan of the AC.
- Climate: RVs operating in hot and humid climates may place more strain on the air conditioner, affecting its longevity.
- Quality of installation: Proper installation by qualified professionals can ensure optimal performance and longevity of the AC unit.
- Quality of components: Higher-quality AC units with durable components may last longer than lower-quality units.
FAQs
What voltage is RV AC?
RV air conditioners commonly use 120 volts AC (alternating current). Some larger caravans or motorhomes may have cooling systems that call for 240-volt AC, mainly if they are more powerful or have numerous air conditioners. Check the particular voltage needs of your RV’s air conditioner to verify compatibility with your RV’s electrical system and power hookup options.
Is it an RV AC or DC?
Van air conditioners run on AC (alternating current) electricity, which is the typical electricity source in most RVs when hooked up to shore power or a generator. Specific components of an RV, such as lighting and small appliances, may work on DC (direct current) electricity from batteries while not linked to an AC power source.
What is the minimum AC cycle time?
The minimum AC cycle time refers to how long an air conditioner should run continuously throughout each cooling cycle. Air conditioners should run for at least 10 to 15 minutes per round to properly remove humidity and provide the best cooling performance. Running the air conditioner for shorter cycles can lead to insufficient dehumidification and inefficient operation, which could result in severe damage to the system due to frequent starts and stops.
How do I know if my compressor or condenser is bad?
You are likely experiencing compressor or condenser issues if your air conditioning system makes strange sounds like grinding or banging or if it’s not cooling effectively regardless of running. Frequent cycling of the air conditioning system and tripped circuit breakers are further indicators of potential compressor issues. It’s recommended to have a professional HVAC technician inspect your system for accurate diagnosis and repairs if you notice these symptoms.
Conclusion
Lastly, monitoring the warning signals of probable compressor or condenser problems in your air conditioner is critical for keeping your cooling system running efficiently and for a long time. Suppose you detect unusual noises, insufficient cooling, frequent cycling, or any of the other symptoms listed above. In that case, you should immediately contact a certified HVAC specialist for professional diagnosis and repair. Addressing compressor or condenser issues early will help prevent future damage, assure peak performance, and extend the life of your air conditioner. Regular maintenance and prompt repairs are critical to keeping your air conditioning system functioning smoothly and efficiently, especially during the warmer months when reliable cooling is required. Stay active in caring for the air conditioner to enjoy consistent comfort and cooling in your residence or vehicle.


Pingback: How to Dispose of Camping Propane Tanks? - The Great Outdoors Blog
Pingback: Halloween Tent Decorating Ideas (Ultimate Guide) 2024
Pingback: Here's - The Right Way to Dispose of Camping Propane Tanks